DIY Cat Toys and Furniture: Fun Projects for You and Your Cat
Anyone who shares a home with a cat knows those little furballs crave things to swat, chase, and curl up on. Instead of emptying your wallet on pricey pet gear you can try quick, rewarding projects in your own living room. Crafting toys or a fresh resting perch is cheap, keeps old materials out of the trash, and gives you both something fun to do together. Better still, every piece you build can be sized and styled to fit your pets odd quirks, whether they lean toward crinkly, feathery, or seriously box-shaped. So grab some odds and ends from the recycling bin and let us explore a handful of simple, satisfying builds!
Why DIY Cat Toys Are Purrfect
There are plenty of reasons to fold cat crafts into your weekend routine. Reusing toilet paper tubes, scrap fabric, and other household cast-offs cuts down on waste while giving your brain a little creative workout. You also get the pleasure of knowing the finished product was made just for your pet. Whether that means a bright pom-pom ball for frenzied stalking or a heavy sock toy to bat under the couch, the choice is all yours-and hers.
Honestly, theres hardly a greater thrill than seeing your cat pounce on a toy you whipped up with your own two hands.
DIY Cat Toys from Stuff You Already Own
You probably have all kinds of bits and pieces hanging around that can quickly turn into kitty fun. Give a few of these quick projects a go:
- Toilet-paper rolls: Before you toss one, cram in some crinkle paper or a handful of Treats & let your cat swat it all over the floor.
- Feather wand: Tie a couple feathers to a length of string or a chopstick and youve created a teases-stick thatll have your cat leaping.
- Cardboard box: Boxes are kitty magic. Cut a few holes and suddenly youve built a snazzy hideout your cat will patrol for hours.
- Sock catnip toy: Stuff an old sock with catnip, knot it tight, and youve made an instant kicker toy your cat will drag around proudly.
- Safety First: Tips for DIY Cat Toys
Crafting toys for your cat can be a blast, but every project should start with safety in mind. Keep these quick tips in mind to make sure your new creations are as safe as they are fun.
- Avoid Small Parts: Double-check that no tiny beads, buttons, or other bits can slip into curious jaws.
- Use Non-Toxic Materials: Pick craft supplies marked safe for pets; steer clear of harsh glues, paints, or other chemicals.
- Supervised Playtime: Keep an eye on your cat while she plays with a fresh toy to catch trouble before it starts.
- Check for Wear and Tear: Give toys a regular inspection and toss or repair them before fraying strings or worn bits become a hazard.
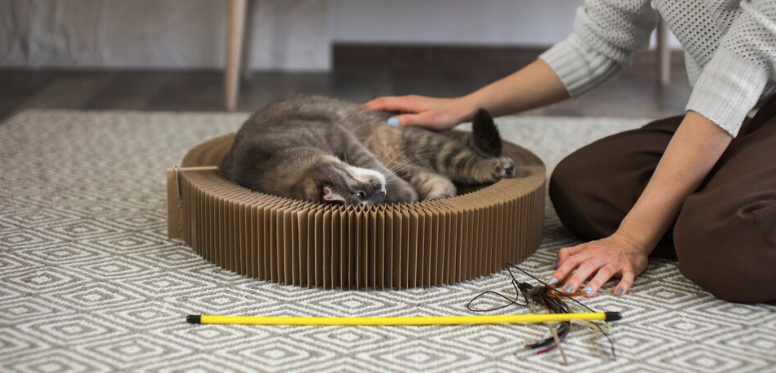
- DIY Cat Furniture: Creating a Purrfect Space
Toys are only part of the puzzle; a happy cat also needs cozy places to climb, scratch, and nap. With a bit of time and imagination you can build custom furniture that suits your style and makes your feline feel like a kingdom MVP.
For more creative ideas on keeping your cat active and entertained, check out our guide on Interactive games and activities to keep your cat entertaine
Building a DIY Cat Scratching Post
The best way to keep those claws in shape and your sofa untouched is to give your cat a sturdy scratching post of her own. Follow these simple steps to build one that looks good and stands up to daily workouts.
- Materials Youll Need: Heavy Base Board and Tall, Straight PVC Pipe or Timber: The core structure; keep it heavy enough so it wont tip.
- Sisal Rope: This durable material is perfect for scratching.
- A Sturdy Base: Start with wood or thick cardboard so it wont wobble.
- A Post: Use a wooden dowel or a hefty cardboard tube.
- Glue: Reliable craft glue locks the rope in place.
Steps to Build:
- Prepare the Base: Cut it to your chosen size and double-check that it stays flat.
- Attach the Post: Fix the post to the base with screws or strong glue.
- Wrap with Sisal Rope: Coil the rope tightly, adding glue every few turns.
- Add Finishing Touches: Paint the base or place a small cushion on top.
DIY Cat Tree: The Ultimate Cat Playground
A cat tree blends playtime and nap time into one handy piece of furniture. It lets your cat leap, scratch, and survey the room from cozy ledges. Best of all, building one yourself is simpler than many folks imagine.
Materials:
- Wood for the Structure: Use plywood for a solid base and shelves.
- Sisal Rope: Wrap posts so your cat can scratch without destroying furniture.
- Soft Fabric: Cover perches with fleece or carpet so your pet naps in comfort.
Steps:
- Plan the Design: Draw a rough sketch showing ramps, perches, and scratching spots.
- Assemble the Frame: First, put together the sturdy bottom, then join the upright posts. Check every joint so nothing wobbles.
- Add Scratching and Lounging Areas: Wind thick sisal around each post, then pad the shelves with cozy fabric.
- Finishing Touches: Lightly sand any splinters and test the whole thing to be sure it wont collapse under eager paws.
Your cat will rave about the new playground, and youll get that warm DIY glow.
Final Thoughts: A Happy Cat, A Happy Home
Building toys and perches at home keeps your Pet active and costs much less than store setups. Even better, you can shape each piece to match your cats quirks and your rooms look. So gather tools, let ideas flow, and sit back while whiskers, naps, and your pride take center stage.
Get Started Today
Ready to join a platform built with your mission in mind?
Sign up your shelter on Pawrpose and start reaching more hearts, homes, and helping hands.
Available now on iOS & Android.
We have prepared a small step-by-step guide to adopting a pet > Read More Here
#AnimalShelters #PetAdoptionPlatform #PawrposeForShelters #AnimalRescue #PetFosterProgram #ShelterDonations #PetAdoptionEvents #PetRescueApp